

Browse your Koofr photo gallery in Kodi
Are you using Kodi as your media centre software? It allows its users to play and view most videos, music, podcasts and other digital media files. But, you can also connect it to Koofr with WebDAV protocol and use it to view your Koofr photo galleries. Read on and find out how.
Kodi, formerly known as XBMC is an award-winning entertainment centre software that brings all your digital media together. It is a free and open-source media player that is customizable and runs on a wide variety of devices. You can install it on Linux, OSX, Windows, iOS and Android and it is supported by a dedicated team of volunteers and a huge community of users.
Kodi allows users to play and view most videos, music, podcasts, and other digital media files from local and network storage as well as from the internet. You can connect it to Koofr with the help of the WebDAV protocol. Read on and find out how.

First, download Kodi from its official webpage and set it up on your device. You can choose between different operating systems.
Note: We tested the WebDAV connection to Koofr on Kodi for Windows.
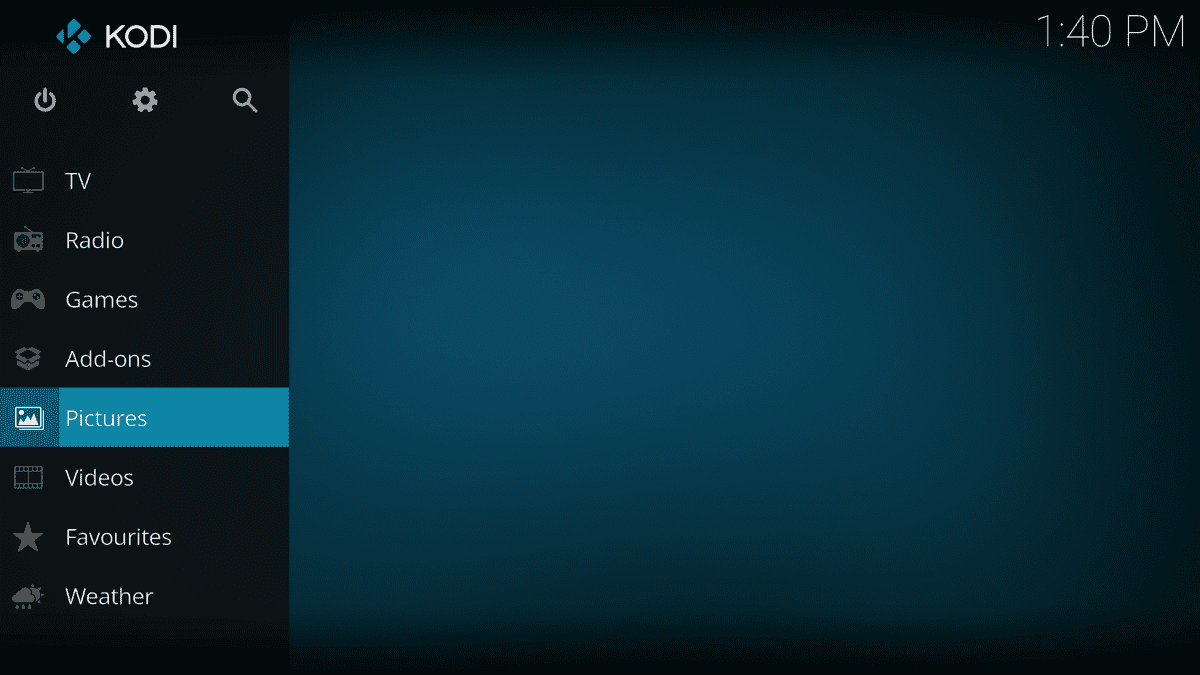
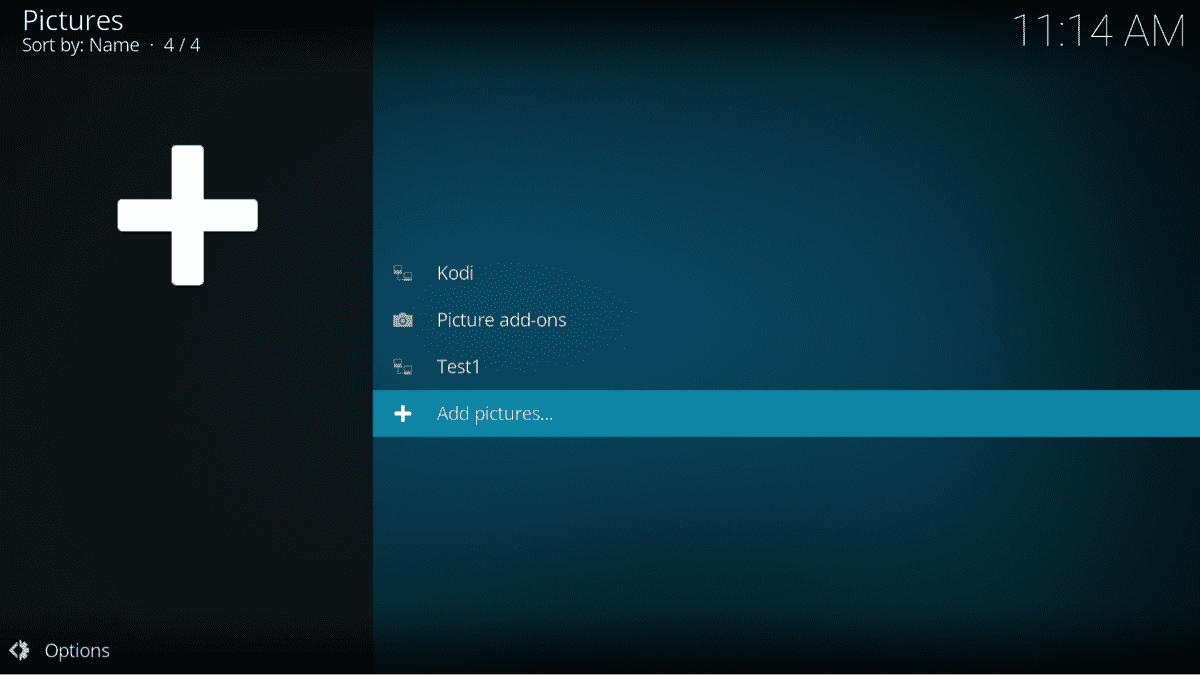
(1) Open Kodi on your device and click on Pictures in the menu on the left.
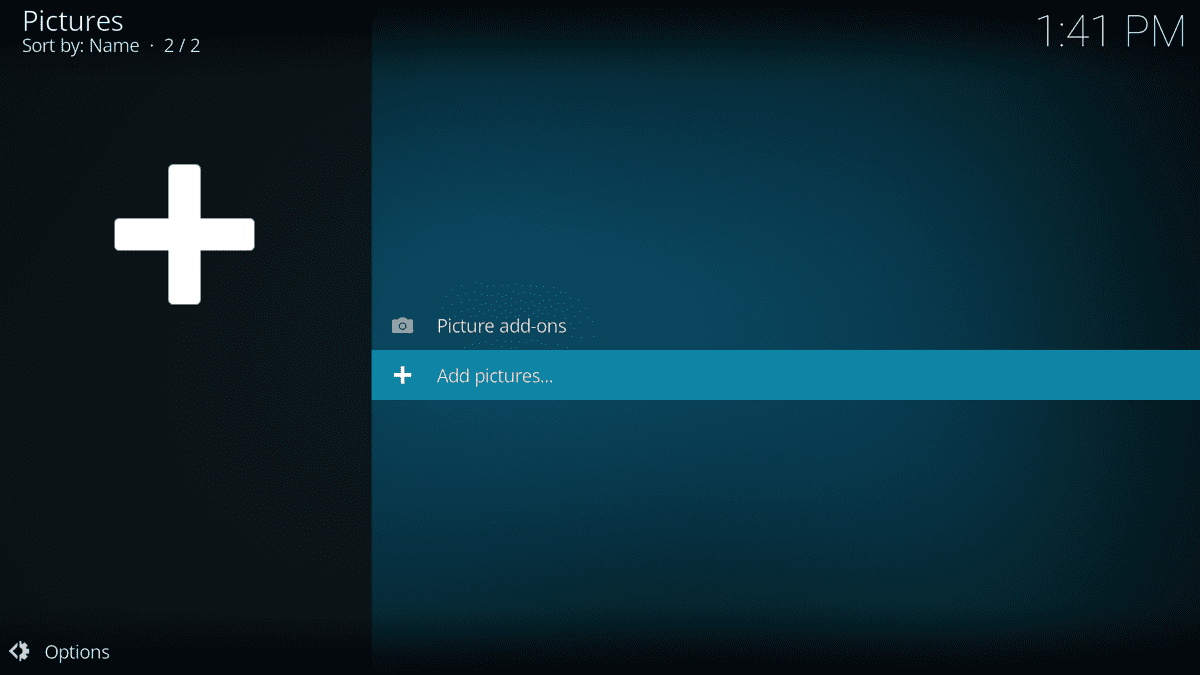
(2) Click on Add pictures.
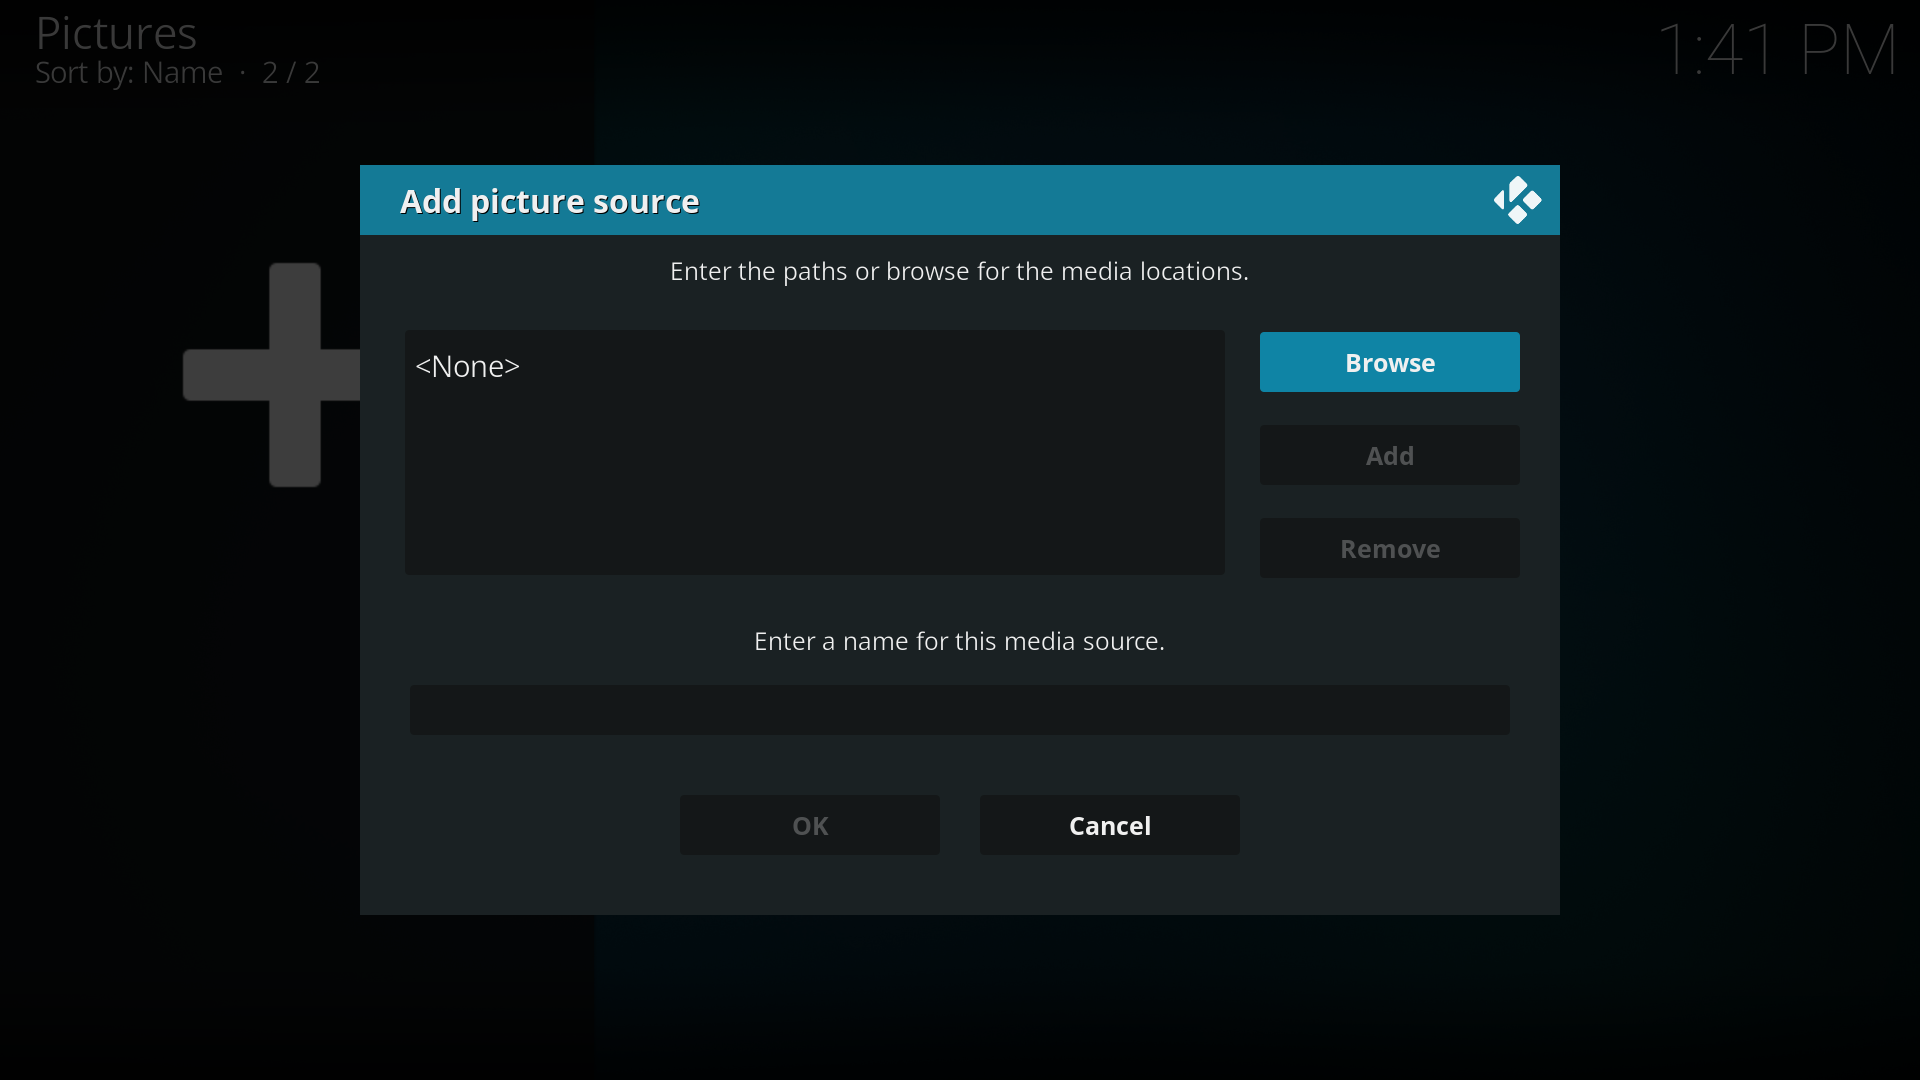
(3) Click on Browse, to add a new picture source.
(4) Click on Add network location.
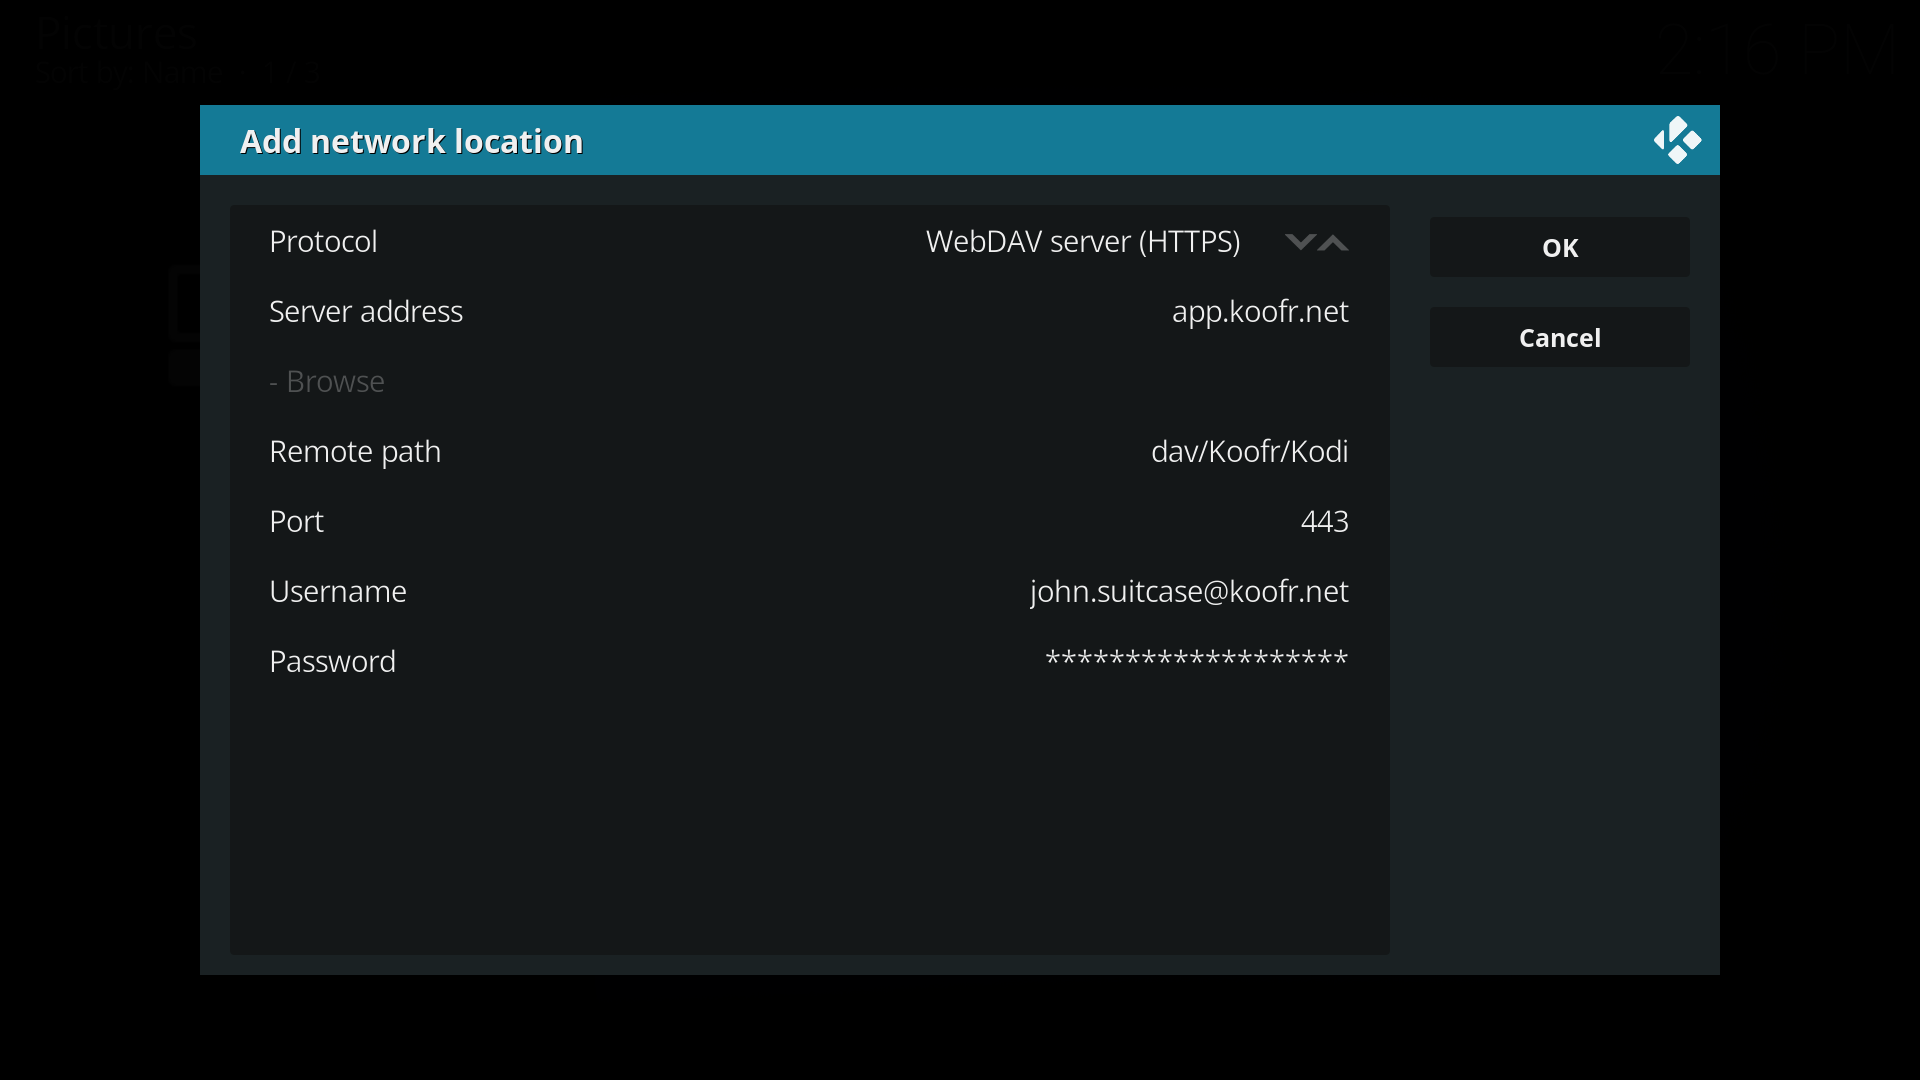
(5) Click on the arrows next to Protocol to find the WebDAV server (HTTPS).

(6) Enter the Server address: app.koofr.net/dav/Koofr, Remote path: dav/Koofr/Kodi and Port: 443. Insert in the email address you are using to log in to your Koofr account as a User.
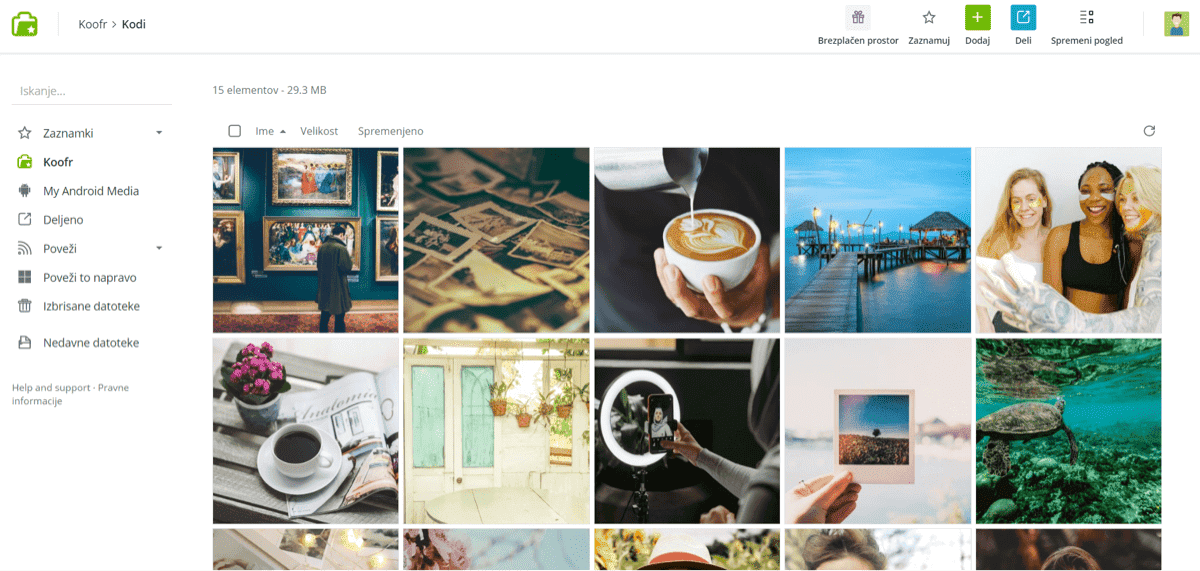
(7) Now go to your Koofr account and create a Kodi folder, otherwise, the WebDAV connection will not work. Upload your photo gallery into the Kodi folder.
(8) Go to Koofr Account Settings, click on Preferences and find Password tab on the left. Scroll down and click into the Generate a new password. We named our password Kodi, as you can see in the picture below.

(9) Open Kodi and paste the Koofr generated password under Password. Your settings should look like those in the picture below. Click on OK to set up the connection.
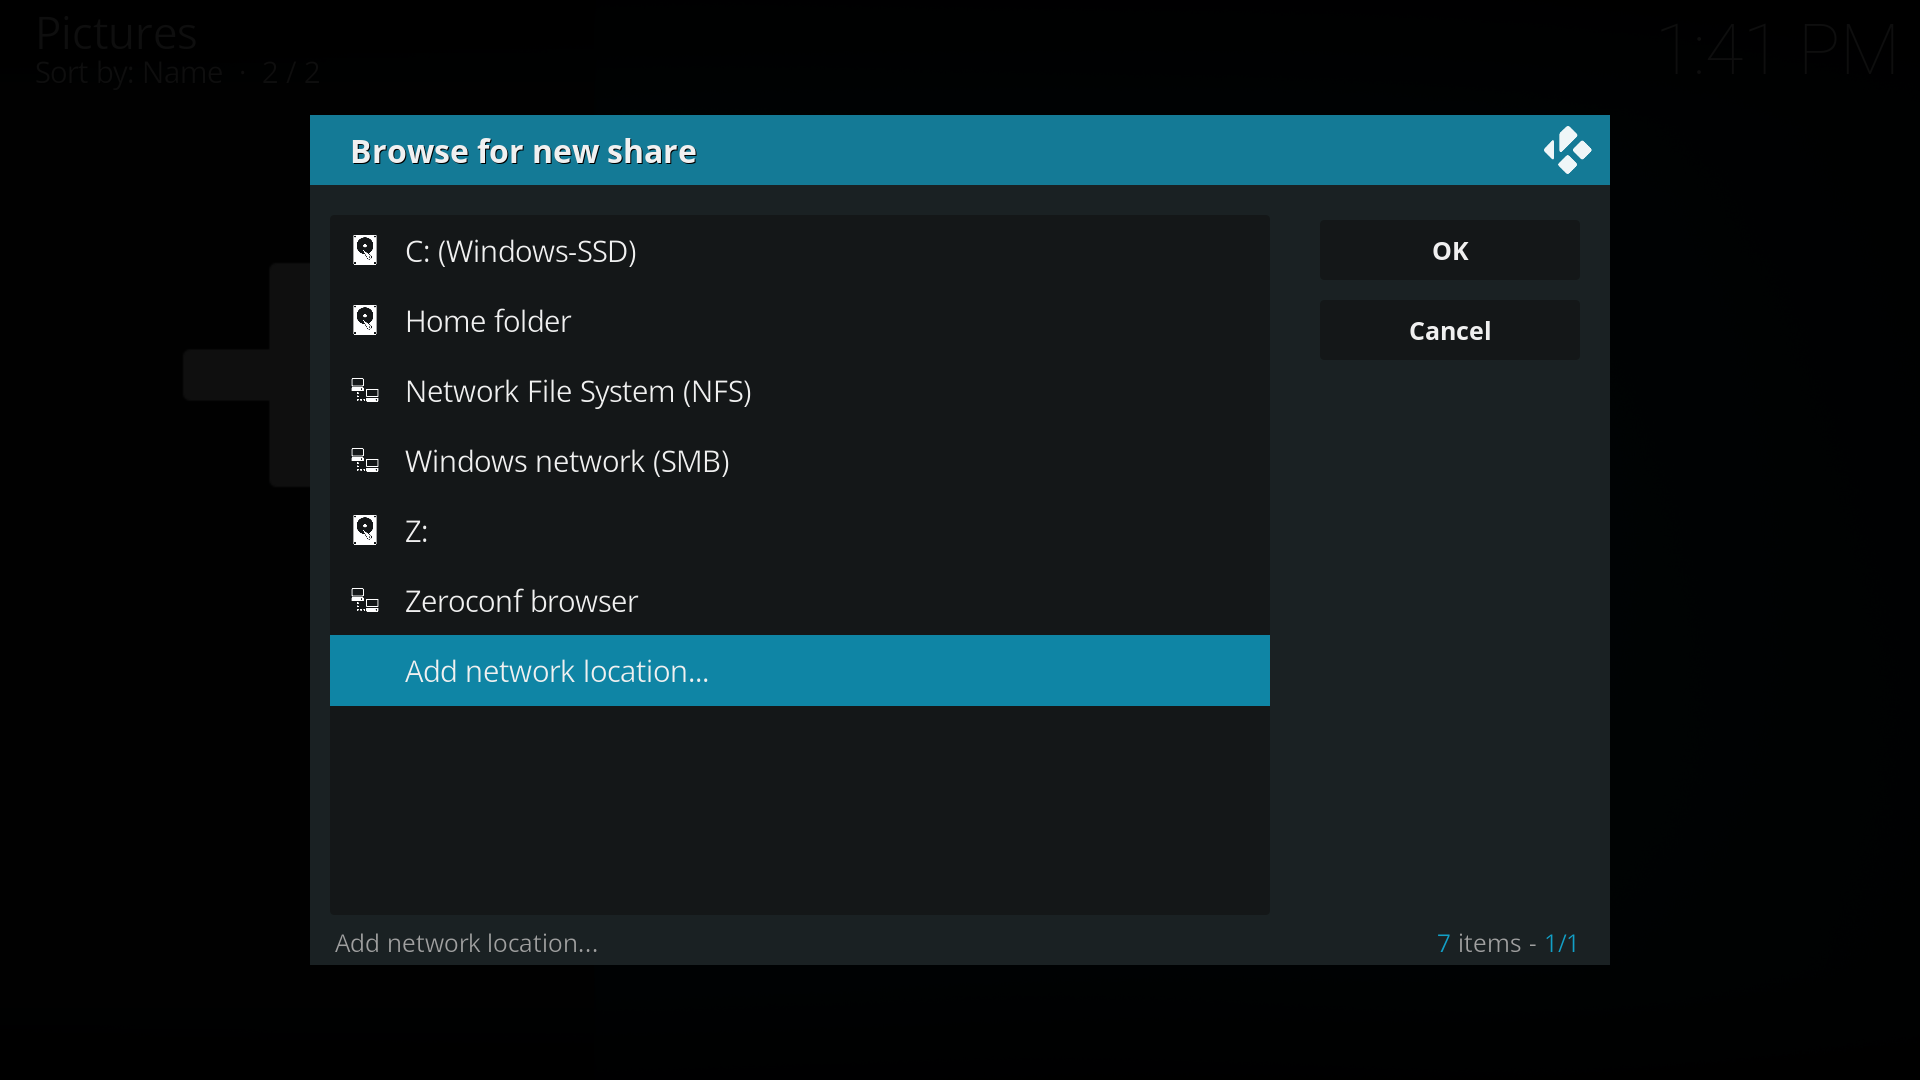
(10) In a Browse for new share select davs://app.koofr.net:443/dav/Koofr/Kodi and click Ok.

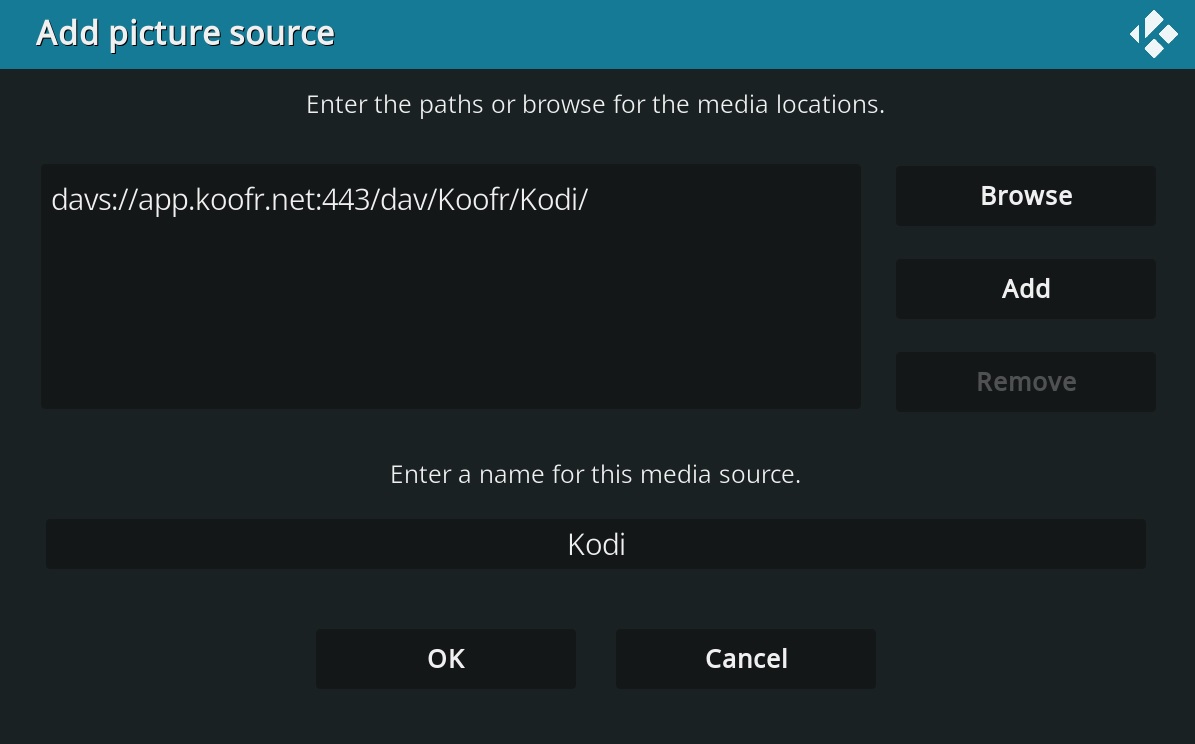
(11) A new window Add picture source will open and you will see the davs://app.koofr.net:443/dav/Koofr/Kodi/ address typed in. Click Ok.
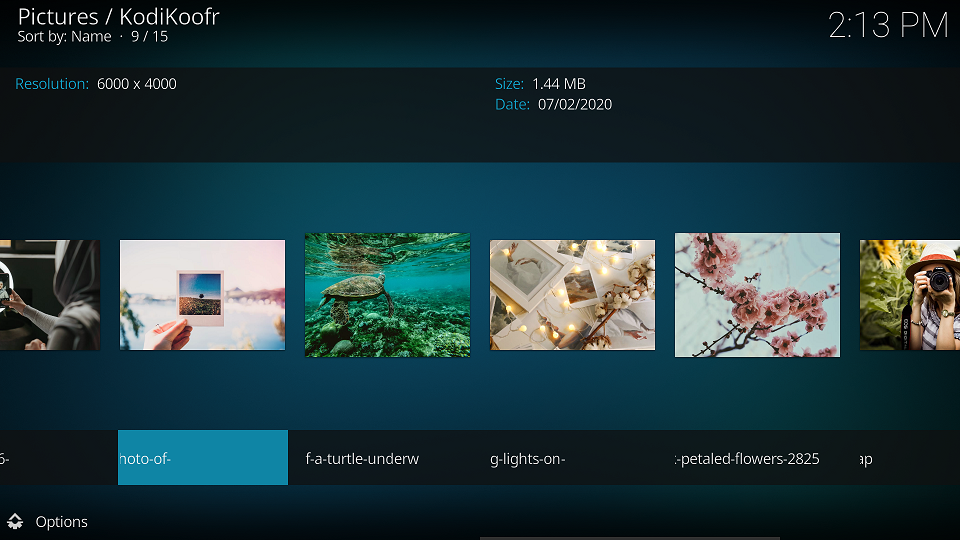
(12) Click on Kodi file and the program will start scanning your files.
(13) View your photo gallery in Kodi.
(14) You can arrange your photos in Kodi with the options you can see in the picture below.

We hope you enjoy viewing your Koofr photo galleries in Kodi.
Want to talk to us? Join us on the Koofr subreddit!