

Mount Koofr as a network drive on macOS with rclone
Would you like to mount Koofr as a network drive with rclone on your Mac, so it automatically appears on your computer upon logging in? Check out our step-by-step guide on how to accomplish this.
Rclone is an open-source command-line program that helps you manage files across different cloud storage services. It works seamlessly with Koofr, allowing tasks like moving, copying, syncing, setting up client-side encryption, and performing various other operations with your Koofr files. Furthermore, rclone is compatible with Koofr Vault.
You can also mount Koofr as a network drive on your computer using rclone. While we've previously covered the process for Windows, in this blog post, we'd like to demonstrate how to mount Koofr as a network drive on macOS using rclone.
Mount Koofr as a network drive on macOS with rclone
1. Download rclone
First, you need to download the appropriate version of rclone for your Mac. Depending on the version of the operating system installed on your Mac, you can choose between Intel/AMD - 64 Bit or ARM - 64 Bit. If you have an Intel-based processor, download Intel/AMD - 64 Bit, and if your have an M1 or newer, download ARM - 64 Bit.
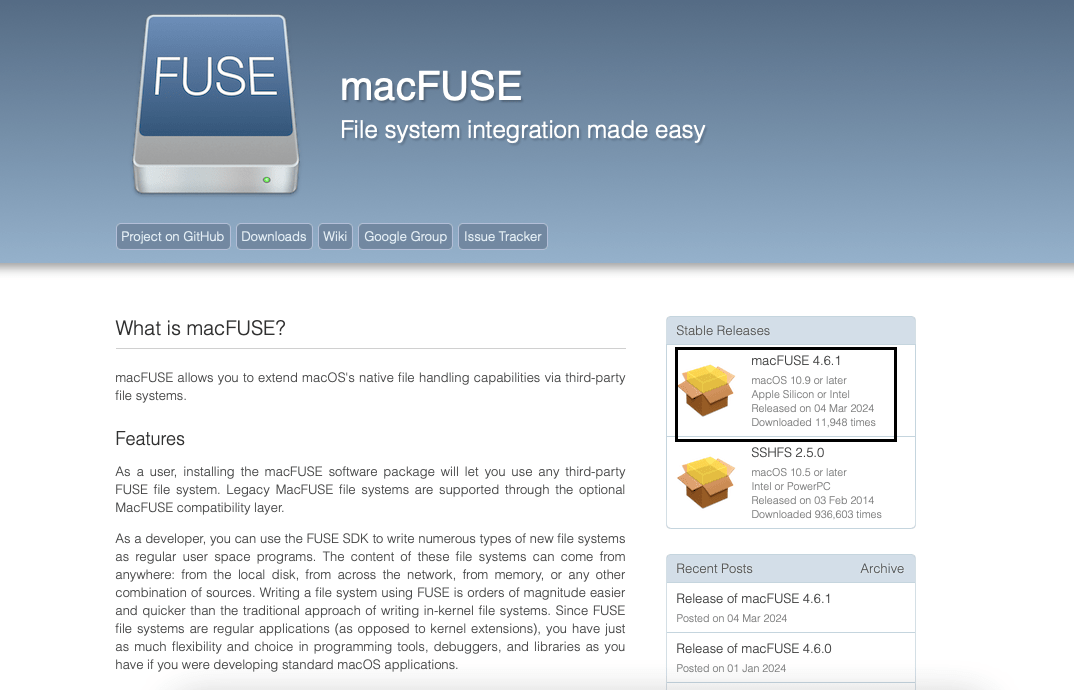
2. Download macFuse
After downloading rclone, download macFuse and install it on your computer. Once installed, reboot your computer.
3. Set up rclone
Now that you have rclone downloaded and macFuse installed, it's time to set up rclone. Open Terminal and type the following command:
sudo cp rclone /usr/local/bin/
With this command, rclone will be saved in the bin folder on your computer. You can also save rclone to another location if you prefer. However, if you choose to do so, make sure to be “in” that folder before you start creating your first remote. By using the mentioned command, you can start creating a new remote without needing to be "in" the bin folder.
4. Create a connection to Koofr (remote)
To begin configuring rclone, simply type rclone config into the command window. With this command, you can add, remove, or edit a remote. Your remote configurations are stored in a config file, and you have the option to encrypt this file.
rclone config
Note: we didn’t encrypt our config file.
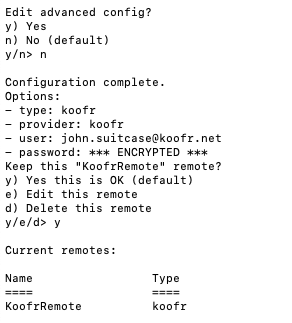
After you enter the command, you will see three options presented in the picture below:

Type n + Enter, and name your new remote. We named ours KoofrRemote. Press Enter.
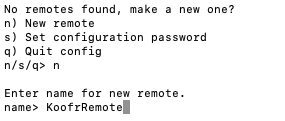
Note: Feel free to choose any name for your remote control, but do not use spaces in the name. Make sure to stick with the same name when entering commands into rclone later.
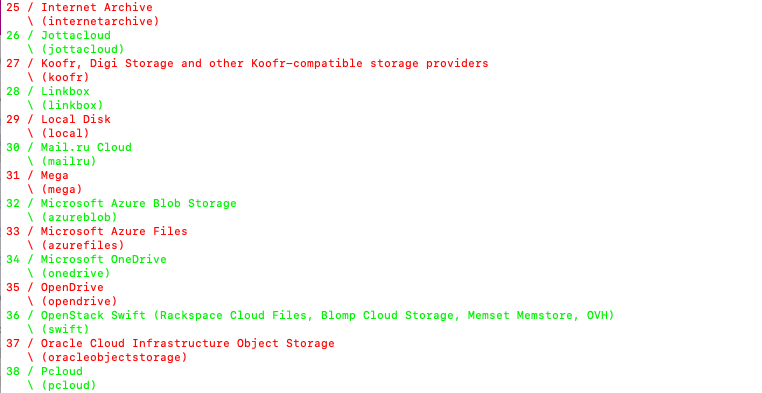
In the following step, rclone will display a list of storage services. Find Koofr and type in the number for the Koofr-compatible storage providers. In this case, press 27 + Enter.
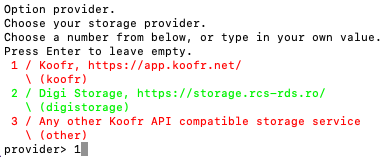
Following that, you'll need to select from a list of storage providers that support the Koofr API. Enter the corresponding number 1 + Enter to select Koofr.
In the next step, write your Koofr username and press Enter.
Then, open your Koofr web app and generate an application-specific password. If you're unsure how to create it, refer to the instructions provided in our FAQ for guidance.
When asked about the password for rclone, choose y + Enter to type in your own password, generated in Koofr.

Copy and paste the password generated from the Koofr web app and press Enter. Confirm the password and press Enter again.
When prompted to edit the advanced configuration, type n + Enter unless you want to make changes. After completing this step, you will see a summary of the remote you created. From there, you can confirm it, delete it, or make additional edits if necessary. If you're satisfied with your remote, press y + Enter. Your remote is now created.
5. Mount Koofr as a network drive on macOS
Now that you’ve created your remote, you can start mounting Koofr as a network drive. Create a new folder or choose an existing one where you want your network drive to be located. We created a new folder located at /Users/koofr/KoofrDrive/. The folder is named KoofrDrive.
You have two options to mount Koofr as a network drive.
Option 1: Automatic at login
Open your preferred text editor and copy and paste this text:
<?xml version="1.0" encoding="UTF-8"?>
<!DOCTYPE plist PUBLIC "-//Apple//DTD PLIST 1.0//EN" "http://www.apple.com/DTDs/PropertyList-1.0.dtd">
<plist version="1.0">
    <dict>
        <key>KeepAlive</key>
            <true/>
        <key>Label</key>
            <string>Koofr-rclone</string>
        <key>ProgramArguments</key>
            <array>
                <string>/usr/local/bin/rclone</string>
                <string>mount</string>
                <string>KoofrRemote:</string>
                <string>/Users/Koofr/KoofrDrive/</string>
                <string>--vfs-cache-mode=full</string>
                <string>--config=/Users/koofr/.config/rclone/rclone.conf</string>
            </array>
        <key>RunAtLoad</key>
            <true/>
        <key>StandardErrorPath</key>
            <string>/Users/koofr/rclone-stderr.log</string>
        <key>StandardOutPath</key>
            <string>/Users/koofr/rclone-stdout.log</string>
    </dict>
</plist>
Note: You will need to change some of the strings from the command:
- "
/usr/local/bin/rclone ": /usr/local/bin/rclone is the location where you saved rclone on your computer. If you saved it in some other location, replace it appropriately. - "
KoofrRemote: ": KoofrRemote is the name of your remote. If you named your remote differently, replace KoofrRemote: with the name of your remote. It is very important to write a colon symbol (:) after the name of your remote. - "
/Users/Koofr/KoofrDrive/ ": /Users/Koofr/KoofrDrive/ is the location of the folder where the network drive is located. Replace it with the directory where you want to mount Koofr on your macOS system. - In "
--config=/Users/koofr/.config/rclone/rclone.conf " replace Koofr with your username or whole path with your custom path, if you’re using a non-default location.
After that, save this text file to the path:
/Users/koofr/Library/LaunchAgents/net.koofr.rclone.plist
Replace /Users/koofr/ with a path to your home directory.
After you have correctly edited the command, save this text file. It’s important to log out of your computer and then log back in.
You have now successfully mounted Koofr as a network drive on macOS and can access your Koofr files through the mounted directory on your macOS system like any other folder.
Option 2: Manual
Note: If you choose this option, the network drive will stay active only while the Terminal is open. Once you exit the Terminal, the network drive will no longer be visible on your computer.
Open the Terminal again and type q + Enter to quit the remote. Then, type in the following command:
rclone mount KoofrRemote: /Users/koofr/KoofrDrive/ --vfs-cache-mode full
Instead of KoofrRemote, type in the name of your remote. Instead of /Users/koofr/KoofrDrive/ write the location of the folder you've created or chosen for your network drive.
After that, press Enter, and Koofr will be mounted as a network drive on your computer.
Do you like using rclone? Share your experience with us on the Koofr subreddit!